Makeup can be a powerful tool to enhance natural beauty and boost confidence. For beginners, the makeup world may seem overwhelming, with countless products and techniques to master.
This guide will break down the basics into easy steps. You can create a polished look, even if you’re just starting. Let’s dive into the essentials of makeup application, focusing on achieving a flawless finish.
Step 1: Prepping Your Skin

Wash and Cleanse Your Skin
Starting with a clean face is crucial. Wash and use a gentle cleanser to remove any dirt, oil, or makeup residue. Cleansing helps prevent clogged pores and provides a fresh canvas for your makeup.
Exfoliate
Exfoliating removes dead skin cells, promoting a smooth texture. It helps to prevent cakey results and improve product absorption on the skin. Avoid harsh scrubs that can irritate your skin.
Moisturize
Hydration is key to a flawless makeup application. Choose a moisturizer suited for your skin type. For oily skin, opt for a lightweight, oil-free moisturizer. For dry skin, a richer, more hydrating formula is ideal.
Prime Your Skin
Primers create a smooth base for foundation, helping your makeup last longer and look better. Choose a primer based on your skin type. Use hydrating primers for dry skin. Use mattifying primers for oily skin. Use color-correcting primers for uneven skin tones.
Step 2: Foundation Application
Choosing the Right Foundation
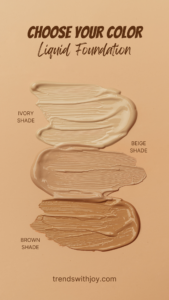
Select a foundation that matches your skin tone and type. For beginners, a liquid foundation is easy to blend and offers buildable coverage. Test the foundation on your jawline to ensure a perfect match. click here to get
Tools for Application
You can use a makeup sponge, foundation brush, or your fingers to apply foundation. A damp makeup sponge provides a natural, dewy finish, while a brush offers more coverage.
Applying Foundation
Start in the center of your face and blend outwards. Use a stippling or bouncing motion with a sponge for an even application. Build coverage gradually to avoid a cakey look.
Step 3: Concealer

Choosing the Right Concealer
Choose a concealer that is lighter than your foundation. It should be one to two shades lighter. This will help brighten under the eyes. For blemishes, select a concealer that matches your foundation. click here to get
Applying Concealer
For under-eye circles, apply concealer in a triangular shape with the base underneath your eye and the point towards your cheek. For blemishes, dab a small amount directly on the spot and blend the edges.
Step 4: Setting Your Base

Setting Powder
To prevent your makeup from creasing and to reduce shine, apply a setting powder. Use a translucent powder for a natural finish or a colored powder for extra coverage. Apply it with a fluffy brush or a powder puff, focusing on areas that tend to get oily, such as the T-zone.
Setting Spray
A setting spray helps lock your makeup in place. It can give a dewy or matte finish, depending on the product you choose. Place the spray at a distance and mist your face lightly.
Step 5: Eye Makeup
Eyeshadow
For beginners, a neutral eyeshadow palette is a good starting point. Apply a light shade all over your lid, a medium shade in the crease, and a darker shade on the outer corner for depth. Blend well to avoid harsh lines.
Eyeliner
For a simple look, use pencil eyeliner along your upper lash line. For a more dramatic effect, try a liquid or gel liner to create a winged look. Begin with small strokes and build up to your desired thickness.
Mascara
Apply mascara to your upper and lower lashes to open up your eyes. Wiggle the wand at the base of your lashes and sweep upwards for added volume and length.
Step 6: Brows
Shaping Your Brows
Brush your brows upwards with a spoolie brush. Use a brow pencil or powder to fill in sparse areas with light, hair-like strokes. Set your brows with a clear or tinted brow gel.
Step 7: Blush, Bronzer, and Highlighter
Blush
Choose a blush that complements your skin tone. Smile and apply blush to the apples of your cheeks, blending upwards towards your temples.
Bronzer
Apply bronzer to where the sun hits your face. This includes your forehead, cheekbones, and jawline. This adds warmth and dimension to your face.
Highlighter
Apply a highlighter to the high points of your face. These include the tops of your cheekbones, the bridge of your nose, and your Cupid’s bow. This adds a subtle glow and enhances your features.
Step 8: Lips

Lip Balm
Start with a lip balm to ensure your lips are smooth and hydrated.
Lip Liner
Line your lips with a lip liner that matches your lipstick. This defines your lips and helps prevent feathering.
Lipstick or Lip Gloss
Apply your lipstick or lip gloss starting from the center of your lips and moving outwards. Dab with a tissue and reapply to extend the color duration. click here to get
Step 9: Final Touches
Review and Adjust
Check your makeup in natural light to ensure everything is well-blended and even. Make any necessary adjustments with a blending brush or sponge.
Clean Up
Use a cotton swab dipped in a makeup remover. Use it to clean up any smudges or mistakes, especially around the eyes and lips.
Learning how to apply makeup can be a fun and empowering experience. Beginners can enhance their natural beauty with these simple makeup techniques. Remember, practice makes perfect, so don’t be afraid to experiment and find what works best for you.


